Sunday, July 25, 2010

Thanks everyone!

The "It's Not Easy Being Pink" blog hop was such a success! Thank you everyone for the sweet thoughts and prayers for baby Reily. He is doing better now. We thank God that he has made amazing progress these past 2 days. He is now off the IV and the oxygen :)

I wanted to share this card I made last week for a contest held by the Cricut Circle. We were asked to make a card that would be donated to the lymphoma and leukemia center in Arizona. We were only allowed to use Provo Craft and Bazzill products. The card will be judge by Bazzill employees and 2 lucky winners will be able to go to a special Provo Craft event in AZ. Winners will be able to take one guest. Hotel stay and events tickets will be provided. Even if I don't win I know my card will be used for a good cause :)

Photobucket
Photobucket
Photobucket
Photobucket

For this card I used 3 different carts. I used Cherry Limeade for the bird, tree, and Hi!. The cloud, sun, and Just 4 You came from Create a Critter cart. The card shape itself came from Just Because Cards cart. All the paper was from Bazzill. I did some embossing on the cloud and the bird with the Cuttlebug. I used the iRock to adhere the bling and Stickles on the limes.
I do hope this card brings a smile to whoever receives it.

Saturday, July 24, 2010

"It's Not Easy Being Pink" Blog Hop

Hi Everyone!

Welcome to the Blog Hop in which we are sending out a big Thank You to Robyn with My Pink Stamper for allowing us the privilege and honor of being part of her design team for the first term. We also would love to thank her for her creativity and sharing her talents with us. She is an amazing person who is always doing things for other so we wanted to do something special just for her! If you are starting here, this is a Blog Hop that includes 7 bloggers total which consist of the previous My Pink Stamper Design Team (Emma is still a current designer). Our theme is thank you so you will see that throughout each blog as you hop along. You will definitely want to check out everyone’s project and each blog has a fun giveaway to offer!! This is going to be so much fun, so let’s get started!!!

I made this post-it note holder I scrap-lifted from a friend. I thought it was the cutest thing! The only cuts I made were the flamingo from he Serenade solutions cart and the scalloped oval from the French Manor cart. Everything else was cut by the paper cutter and the edge puncher. I will post direction in a later post.
Photobucket
Photobucket
Photobucket

Now on to a small giveaway! I will be giving away all the 3 different sizes of post-its so you can get started on your own post-it note holder. It's not much, but it will sure get you started on your project. I totally forgot to get something for the giveaway. I've been at the hospital this past week since the newest baby in our family is in the ICU :( I promise to put something else in the giveaway once I get a chance to go to the store. Just leave me a comment with a way to get a hold of you. I will be picking the winner on Thursday.

Now on to the next 6 talented Ladies! The next person on the hop is Pam (click on her name to hop on over to her blog and join in on the fun)! If you started this blog hop over on one of the other amazing blogs just click any of the names below and you will be re-directed to the next blog to hop along to!


Julie
Agnes
Emma
Jo
Karla (thats me!)
Pam
Rowena

Thanks for stopping by and Happy Hopping!

Monday, July 5, 2010

My Creative Time- Throwback Thursday Challenge

Here is my submission for Emma's Throwback Thursday challenge. She required any particpant to use the "New Arrival" cart or any old one we had. I decided that I will start naming my cards. Lets see if I will keep this up hahahaha. So here is my "Sweet Dreams" card
Photobucket
Recipe:
New Arrival cart (bassinet 2" moon 2.5")
Stampin Up cardstock in Night of Navy and Always Artichoke
Patterned paper were scraps
Stickles in silver for the moon's eye and stars in the sky
Cream ribbon
White gel pen for white stitching

Friday, June 25, 2010

MPS June project - Summer time tote

Summer is here!!! Kids are getting ready to resume their swim lessons. I made this tote for my niece to take her things to her swim lessons. I couldn't find my tripod, so I made a picture tutorial :)
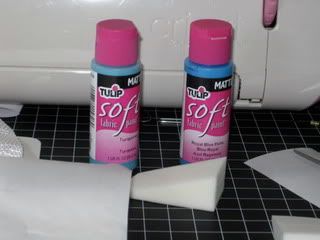
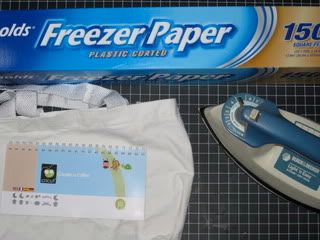
Here are the things you need:
Freezer Paper (Wax paper will not work)
Blank tote
Iron
Any cricut cart. I used Create a Critter
Tulip fabric paint
Photobucket
Photobucket
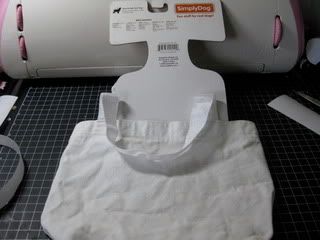
You also need a piece of cardboard, an old magazine, or something to stick inside your bag to prevent any paint soaking on the other side. Mine didnt leak through, but better safe than sorry!
Photobucket
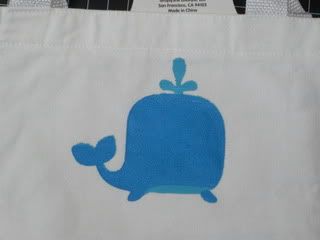
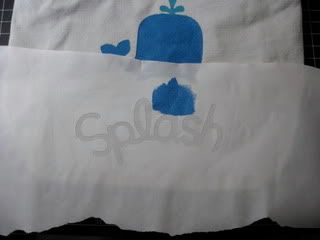
Cut out your stencil on the freezer paper. I used a 12x12 piece of freezer paper. I used the whale from the Create a Critter cart. Cut out the whale, the whale's first layer, and the saying "Splash". Make sure to save any little pieces in your saying. Make sure to place the dull side of the paper down on the mat, the shiny side will not stick to the mat. If you are cutting out a saying, make sure to press the Flip button on your machine or else it'll be backwards when you iron it on.
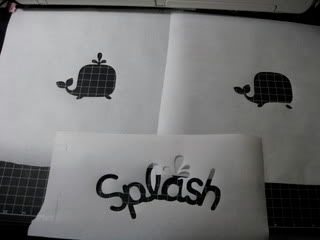
Photobucket
Iron on the stencil to your bag, SHINY SIDE DOWN. I started with the whale's first layer, the one that is squirting water. Make sure all the sides are stuck on the bag to prevent any paint leaking under the paper.
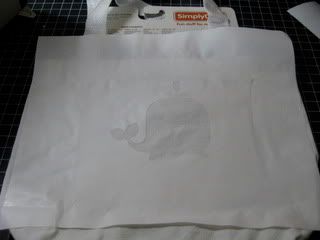
Photobucket
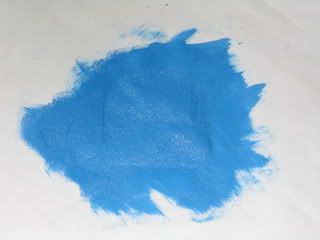
Take some paint and a make up applicator or brush and brush/dab on the paint.
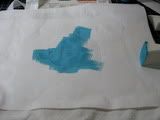
Photobucket
Allow time for the paint to dry. I used my blow drier to speed up the process. Use the cool setting. Once it’s dry to touch, peel off the paper and place the second layer to paint on the different shade of blue. Try to align the image exactly for best results. Iron on this second layer trying to avoid the painted area. It will not damage the painted area, but you might get your iron a little dirty.
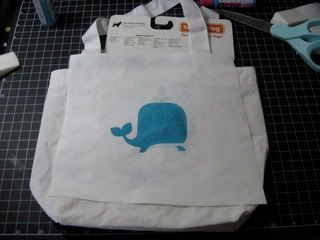
Photobucket
Paint this new area. Let dry and peel off paper.
Photobucket
Photobucket
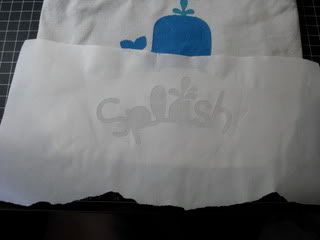
On to the saying. Repeat the same process above. Iron on the paper, making sure to include the small pieces of the saying such as the loop in the L and the circles in the P and A.
Photobucket
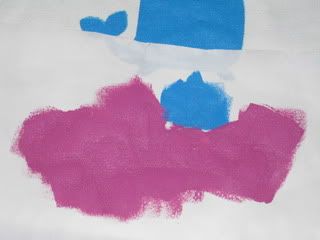
I painted the water squirt blue
Photobucket
And then continued with the magenta wording
Photobucket
While that is drying I added the sun on the corner and then blow dried the sun and the saying.
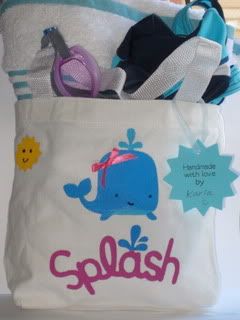
After everything was dry I took some puffy paint and added the eyes and smile on the whale and sun. I also wanted it to be a girl whale, so I glue gunned a pink bow ☺ .
Photobucket
I cut out another sun on blue paper and made a gift tag using Robyn’s Friends & Family stamp set.
I know this was a lot of information, but if any step in unclear, please feel free to email me with your questions craftyraccooneyes@gmail.com

Wednesday, June 23, 2010

MPS Sneak Peek of Tweetie Hoo Puns stamps


Here is my latest project I've created using My Pink Stamper's newest punny stamp set. This set is great if you are using any kind of birds. This set will be released VERY VERY soon. You can start checking her website for her announcement on when these will be released.

Well on to my project. We have yet ANOTHER member in our family that is expecting.

I made this card using the Straight From the Nest cart. I cut the nest on brown paper at 4 inches and the eggs on teal paper also at 4 inches. I kept the Real Dial Size button off because those eggs would've been gigantic! I used a different shade of brown for the card itself. I used SU chocolate chip cardstock and cut it at 5 1/2 x 8 1/2 and the teal paper was cut at 5 1/4 x 4. I stamped the sentiment with chocolate chip ink.
Photobucket
With the same colored ink and a makeup sponge I inked the edges of the nest. I did some heat embossing on the eggs. I used the eraser end of my pencil, dipped it in the embossing ink, sprinkled white embossing powder, and applied heat with the embossing tool.
Photobucket
Keep your eyes out for the release of these stamps! Hope you enjoy my card :)

Monday, June 21, 2010

Baby Shower invite


Simple and easy shower invites I made. I used the onesie and the duck from the New Arrival cart. I cut the onesie at 5.5 inches and the duck at 1.75 inches. I attached the duck with pop-up dots to give it the raised look. For the buttons on each shoulder, I punched out tiny holes on a foam sheet and used the little dots. I used the Martha Stewart screw punch that has 3 different sizes. I used the medium sized hole. I used black Sticlkes for the eye of the duck and orange Stickles for the duck's bill. The back of the invite has a blank sheet of paper on which I printed out all the shower information. I placed each invite in a clear cellophane envelope and gave them to the mom-to-be to hand out.

Wednesday, June 16, 2010

100 followers giveaway winner

And the winner is....

rbaq12 said...
Congrats on hitting 100!


I'll be contacting you shortly :)
Thanks everyone!

(winner was chosen using random.org)